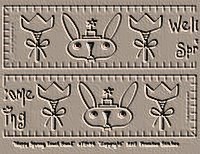
Log Cabin Edged Pillows by www.Primitive-Stitches.com
Log Cabin Edged Pillow
Directions based on a full size stitchery pattern
After stitching is complete, cut muslin into a square by measuring about 2 inches from the farthest point of the completed design on all four sides. Mark and then cut square or rectangle based on design. Fig 1

Next, gather homespun or calico fabric in coordinating colors that match your threads of your stitchery. You may use 1 pattern, 2 patterns or 4 different but coordinating patterns.
Cut or rip strips 3 inches wide by whatever the length of the material. Make sure that at least 2 strips are 6 inches longer than the widest side of your pillow. I like to make a snip with my scissors at the 3 inch mark and then rip the rest of the way. Sometimes material does not rip properly or the pattern is off so if you want you may also cut your strips.
Next, lay your stitched design flat and take your first strip and lay across the top of the stitchery lengthwise. Cut the strip where the stitchery ends so that it now looks like fig. 2

Fig 2
Pin right sides together and stitch straight across the top of the pillow. Open and iron the seam flat. Next, take your second strip and line it along the right edge of the stitchery. Make sure to go from the bottom of the stitchery to the top of the first border as in Fig 3. Cut your strip. With right sides together, stitch along the side of the pillow. Open, iron seam flat

Fig 3
Next, lay your third strip along the bottom edge including the vertical or second strip. Cut to length as before, stitch with right sides together across the bottom edge. Open, iron seam flat. Fig 4

Fig 4
Now for the last piece, lay the strip along the right edge and cut the length including the top strip and bottom strip. With right sides together, stitch along the left edge of pillow. Open, iron flat. Fig 5

Fig 5
Next, cut a piece of homespun/calico the same size as the entire piece for the back. Put right sides together and start to stitch on the bottom left. Fig 6 Stitch all the way around the pillow and stop at the bottom right leaving an opening to stuff.

Fig 6
I suggest now that you follow the directions for finishing your pillows to look like the designers article. This method will give you nice corners without them protruding uo and outward.
Vairations: You may also use 1 or 2 patterns and follow the same directions above. When using two fabrics you can do each corner different as in each two strips that form a corner the same. You may also choose opposite sides by using one fabric for the top and bottom and another for the right and left side.
Another Layout Variation~Strips may also be arranged in the pattern below to give a different look. Fig 7 Just cut the top and bottom strips to the width of the pillow. With right sides together, stitch the top and then the bottom side across pillow. Now, cut 2 more strips for the sides but include the bottom strip and top strip measurements. With right sides together, stitch along both sides of your pillow to complete front. Then cut another piece for the back and follow the directions for stitching the back from the above directions.

Fig 7
If you would like to make the log cabin edge for a smaller pillow, you will want to start with cutting your strips less than 3 inches wide. Make sure to include seam allowances.


