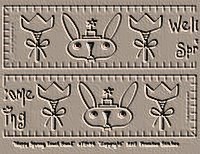
Framing your Primitive Stitchery-by www.Primitive-Stitches.com

~~Framing Your Primitive Stitchery for Resale~~
by:
http://www.Primitive-Stitches.com
If you would like to create your primitive stitchery pictures inexpensively for resale, but need to find a cost effective way in which to frame then this idea might be for you.
I buy my frames at Walmart for $2.50 to $3.00. I look for the ones with the most primitive edging. I then take them home and sand off as much of the varnish that I can. (Just ruff it up really well) I do this to every inch as I want the underside of the frame to be just as nice as the top.
Then I choose an acrylic paint color that coordinates with a color in the stitchery. Matching the paint with a stitchery shade gives your framed item a more uniform look. Remember to choose a paint in keeping with the prim colors and not a bright color. I usually stick to shades of burgundy, tomato red, sage geen, or mustard. I then give the frame two coats of paint letting it dry in between coats. Next, I add a squirt of black acrylic paint to a bowl and add some water. You want this to be somewhat watering but not black water. You then paint the underside of the frame first. Start with a small area and paint the black on top of the color making sure to get in the groves of the frame. Then wipe leaving some black paint behind. You want this to look aged but not like you painted black on top of the color. I then finish the whole frame with this process. When finished, I then stick my finger in the watery black paint and wipe rubbing into areas that I would like to highlight a little darker. Then let your frame dry well.
Once dry, you may now seal the entire frame with an acrylic sealer. I prefer the matte spray found at craft stores. I spray with two coats letting it dry in between.
When dry, your frame is ready for your beautiful stitchery.
I personally stitch with a Warm and Natural batting behind every piece of work. It makes for a much nicer piece when finished. I then take the finished stitchery and cut the batting to the size of the cardboard backing that comes with the frame (The cardboard backing is the insert and not the frame back) I just turn the stitchery face side down and put the cardboard insert over making sure to center everything correctly. This is very important and time is well spent insuring that it is centered before cutting the batting. When you have it centered, I then trace the insert onto the batting. Cut on the traced line. Now your stitchery is ready to mount to the insert without being to bulky to fit into the frame. (due to the batting) Now you should position the finished piece right side up over the cardboard insert aligning the batting so that it fits edge to edge. Then fold the muslin overlapping to the back of the cardboard insert and tape with masking tape. You need to make sure that your corners are crisp and not bulky so that when you put it into the frame it is nice and tight and does not have any creases or folds showing on the front.
You may wish to decide whether you are going to use the glass or leave exposed. If using the glass, remember to windex both sides to eliminate the dirt and fingerprints. Slip your mounted stitchery into your frame and secure. Your work of art is now ready for sale!!
![]()


